
Overview
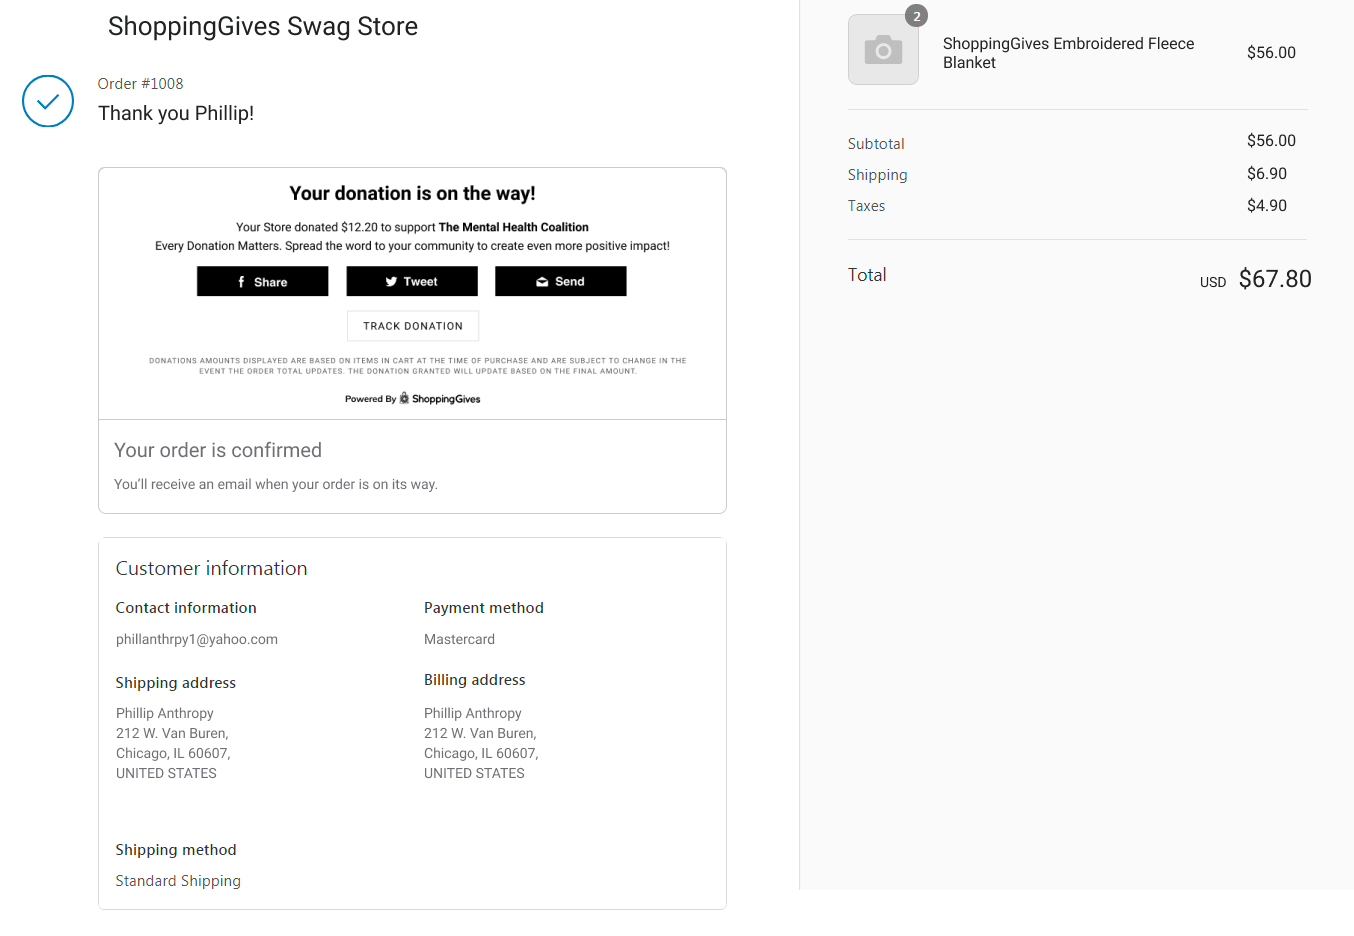
The Donation Embedded Confirmation appears when your customer's donations have been successfully generated. Much like the confirmation window, the customer has the option to share on Facebook and/or Twitter also allowing the customer to write a message to garner support from their community. They will also learn they can track their donations on ShoppingGives by creating an account.
The only difference between the confirmation window and embedded option is this experience is embedded on the page vs. being a pop-up on the screen ("confirmation window"). The confirmation window is also a code-less option to implement, while the embedded confirmation requires a very basic understanding of CSS. We suggest finding a front end developer for help, or utilizing our "quick start" options below. For a better understanding of what a CSS selector is, visit these resources.
What to Expect When Using the Embedded Confirmation Widget
The embedded confirmation will show the total donation amount that their purchase generated, from store donations and customer donations, your store name, and what cause or nonprofit the store donation will support.
When using Product-Level Cause Donations, the embedded screen will show the overall store donation amount that the purchase generated, your store name, the causes/nonprofits that the store donation will support, and the donation amount per each cause.
Example:
How It Works
- To enable your Embedded Confirmation, you will first need to login to your ShoppingGives app.
-
Login to your Shopify Store > ShoppingGives app > Store Donation on Purchase -OR- Round Up > Widget Settings > Donation Confirmation section
-
-OR- Login to the Shopping Gives Impact Portal > Experience > Customize Widget Experience
-
- Select ✔️ Embedded Confirmation
- Define your CSS selector target and it will appear on that location!
- Need help? See our "Quick Start" options below!
- Be sure to hit "Save!"
Need some pointers? See Our "Quick Start" Options for CSS Selectors Below!
We have outlined a handful of CSS selector options that are common amongst most themes. Feel free to use the targets mentioned below, or explore other CSS selectors than the ones we suggest below/ even create your own target element to target!
Target ".main__content" to place near the content box.

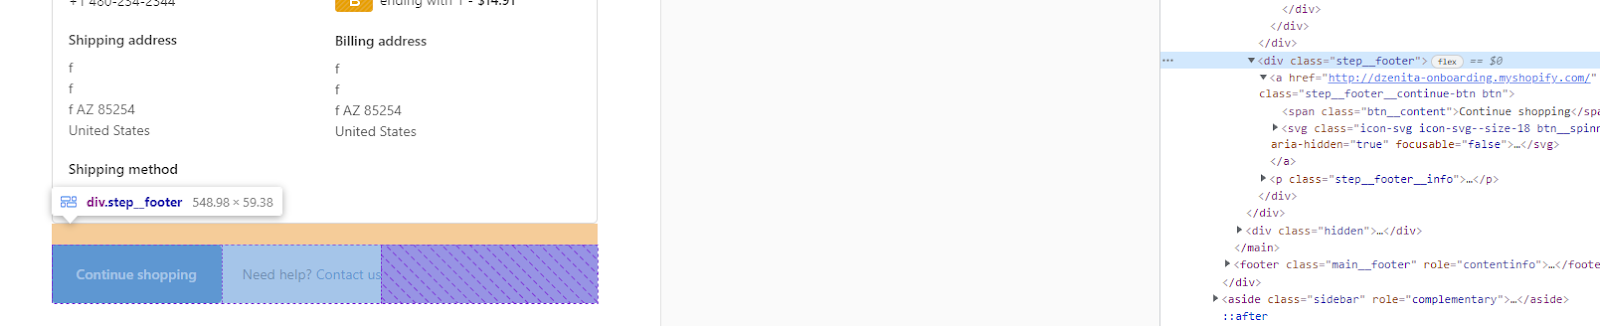
Target ".step__footer" to place near the "Continue shopping" section.
Target ".main__header" to place near the header "store name" (Ex. Dzenita QA) text.

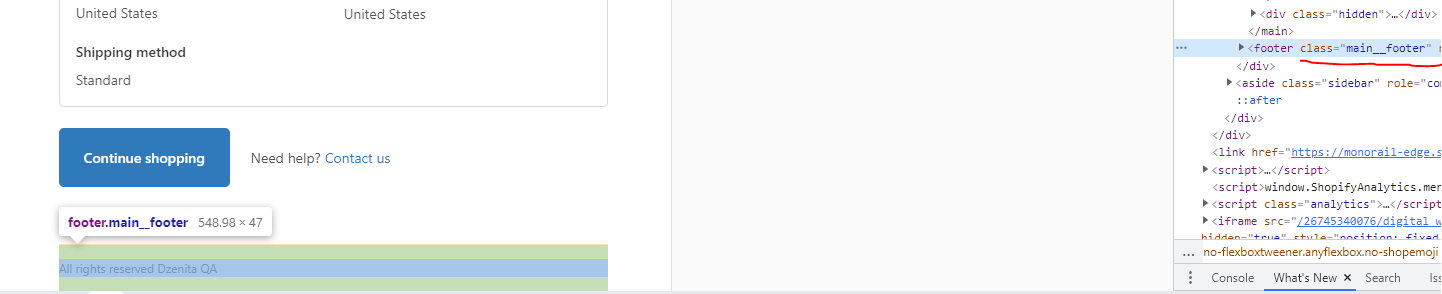
Target ".main__footer" to place near the footer "All rights reserved" text.
*Disclaimer: The above CSS selectors are commonly available on most themes, but not guaranteed on all themes*