
Overview
With ShoppingGives, you have the ability to customize your donation experience, including how and where you choose to present the donation widget on-site. These customization options allow you to create a donation experience that best fits your brand’s needs.
We've provided you with several options on how you can place your widget, supporting no-code placement solutions with our Theme Section or Automatic Placement options as well as enabling the Manual Placement option for those that would like to control the exact locations of their widget.
Widget Settings
You can access these settings from the Impact Portal by clicking on Campaigns from the left side menu, then selecting Store Donations.
Once on the Store Donation on Purchase campaign page, select the Widget Settings tab:

Widget Placement
A widget placement option is required in order for your widget to appear on your website. We have enabled three different ways for you to place your widget
- Theme Sections
- Only available to merchants using an Online Store 2.0 theme.
- Theme Sections allow you to place your widget within the Shopify Online Store editor. You'll be able to drag & drop your widget into your desired location, as well as customize content, colors, and text. See more details here.
- Automatic Placement
- By selecting automatic placement, you'll be able to easily target whether the widget is placed above or below your "Add to Cart" button on your Product Description Page (PDP) and whether you'd like to showcase the widget on your cart page. See below for more details.
- You'll also be able to target a custom CSS selector if you'd prefer to target an element other than the "Add to Cart" button!
- Manual Placement
- You'll be provided with a widget script to manually insert into your desired location.
Widget Location
Product Page Widget
This widget will be placed on the product display page and will calculate the donation total of specific products. Depending on which widget placement option you choose will determine your options for how to place the donation widget on your product page.
By default, the product page widget will be turned on and set to be placed above the Add to Cart button, but you have the option to turn this off if you would not like to display the donation widget on your product page.
Cart Widget
While the Store Donation on Purchase donation widget will automatically appear on your product pages, we also recommend that you place the donation widget on your cart page as well to increase your customers’ exposure to the donation widget, which can increase the chance that they will select a cause before placing their order.
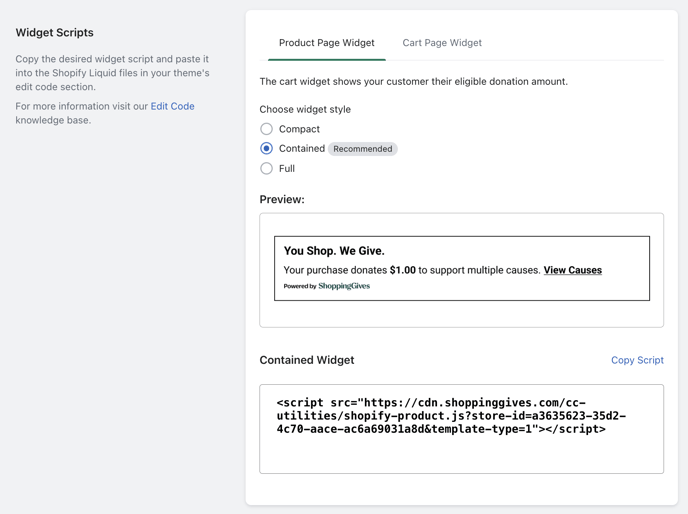
Advanced Options/Widget Scripts
Each of the three Widget Placement options will provide you with the ability to tab over and access your widget scripts. You have access to the script for each style of the donation widget, which you can place into your desired locations. You can read more about placing the donation widget on your cart page here.
Please note that while our donation widgets can be placed on the Checkout page as well, only merchants who are on the Shopify Plus platform are able to access their Checkout template file in order to place any widgets in this location. See this article for more information.