
Overview
With the ShoppingGives app, you have three options for widget placement for your product, cart, and checkout pages when using the Store Donation on Purchase campaign — theme section placement, manual placement, and automatic placement.
Automatic placement will attempt to automatically place the widget at the most optimal location — by default, this placement method targets Product Page widget placement above the "Add to Cart" button with the Cart page widget targeting placement above the "Checkout" button.
If you would like to change the targeted location of the widget, you can use our custom CSS selector to do so.
You can find this within the ShoppingGives Impact Portal by selecting Campaigns from the left side menu -> selecting your desired campaign -> selecting the Widget Settings tab -> ensuring that Automatic Placement is selected as the Widget Placement method -> then scrolling to the Widget Location section seen below:
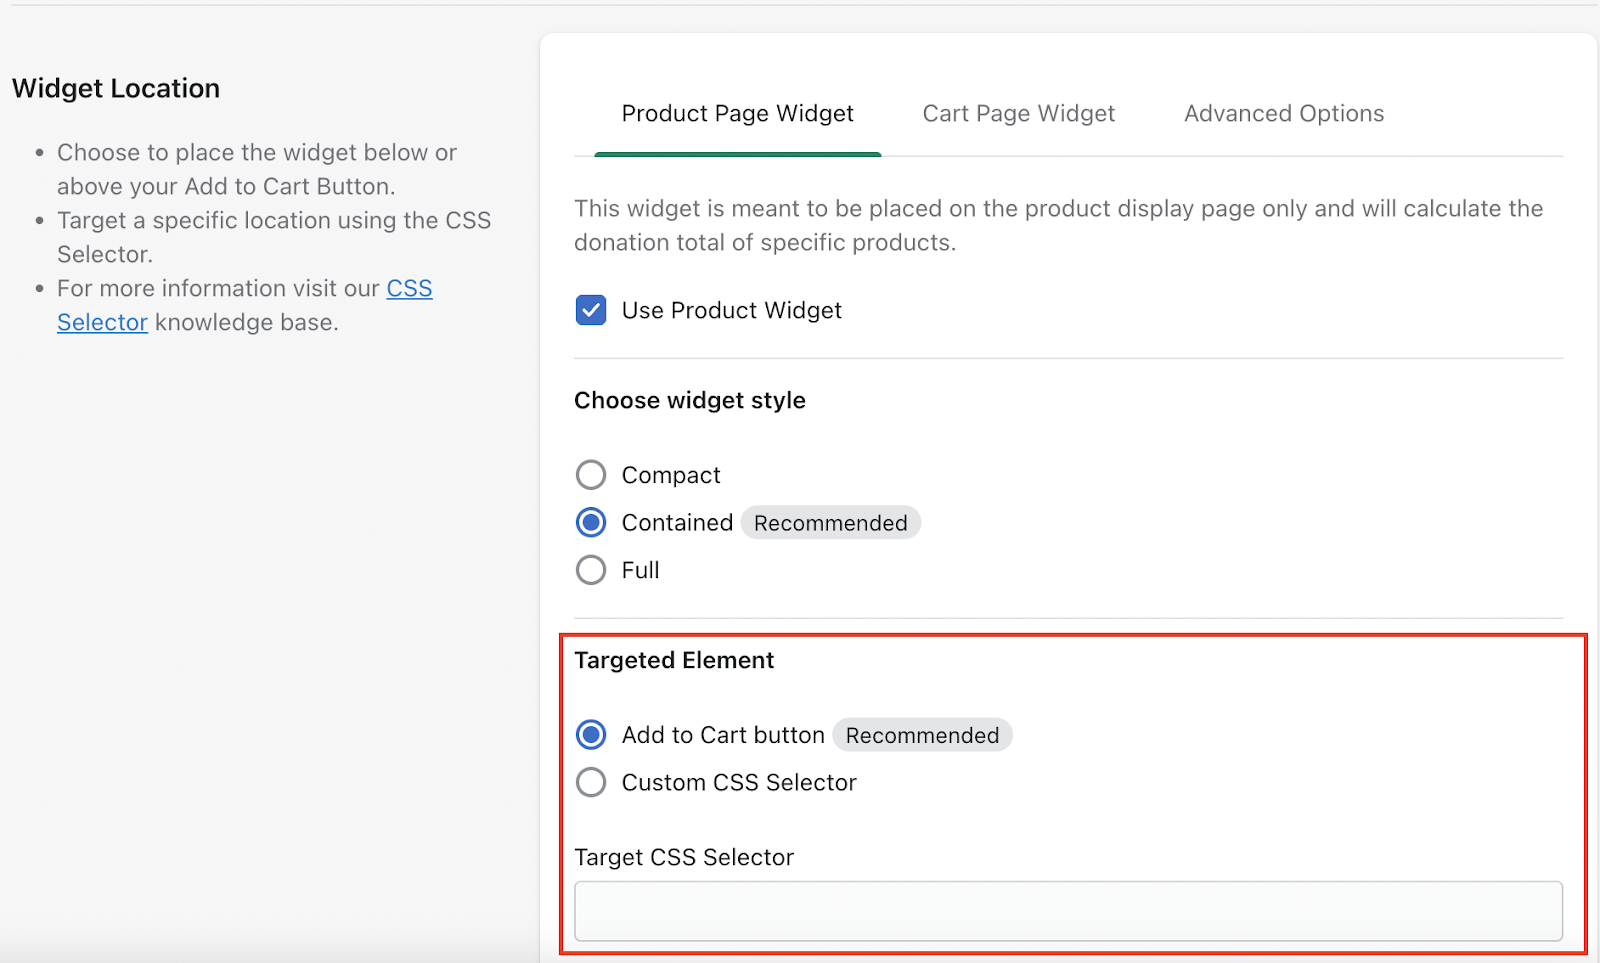
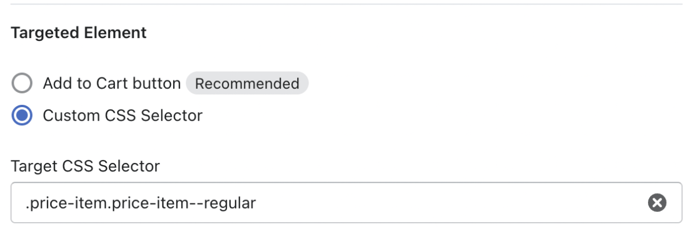
Please note that you will only have the option to use the custom CSS Selector if you have chosen to use the automatic placement option for your Widget Placement settings
***Disclaimer: Utilizing the Custom CSS Selector requires very basic developmental understanding. We suggest finding a front end developer for assistance! If you have the developmental knowledge of what a CSS selector is and how it works, you can skip this next section and go straight into the “Using the CSS Selector” section.
What is a CSS Selector:
CSS selectors are used to select the content you want to style. CSS selectors select HTML elements according to its ID, class, type, attribute, etc.
For a better understanding of what a CSS selector is, check out these resources.
Using the CSS Selector
Step 1: Find a unique element (div, class, label, attributes, or value) that you wish to target and copy the name of the class or ID into the CSS Selector Field.
To do this, open a tab with your desired page > right click your mouse and open the web development tool. E.G. select “Browser Developer” for Safari or “Inspect” for Chrome > and open the “Elements” tab:
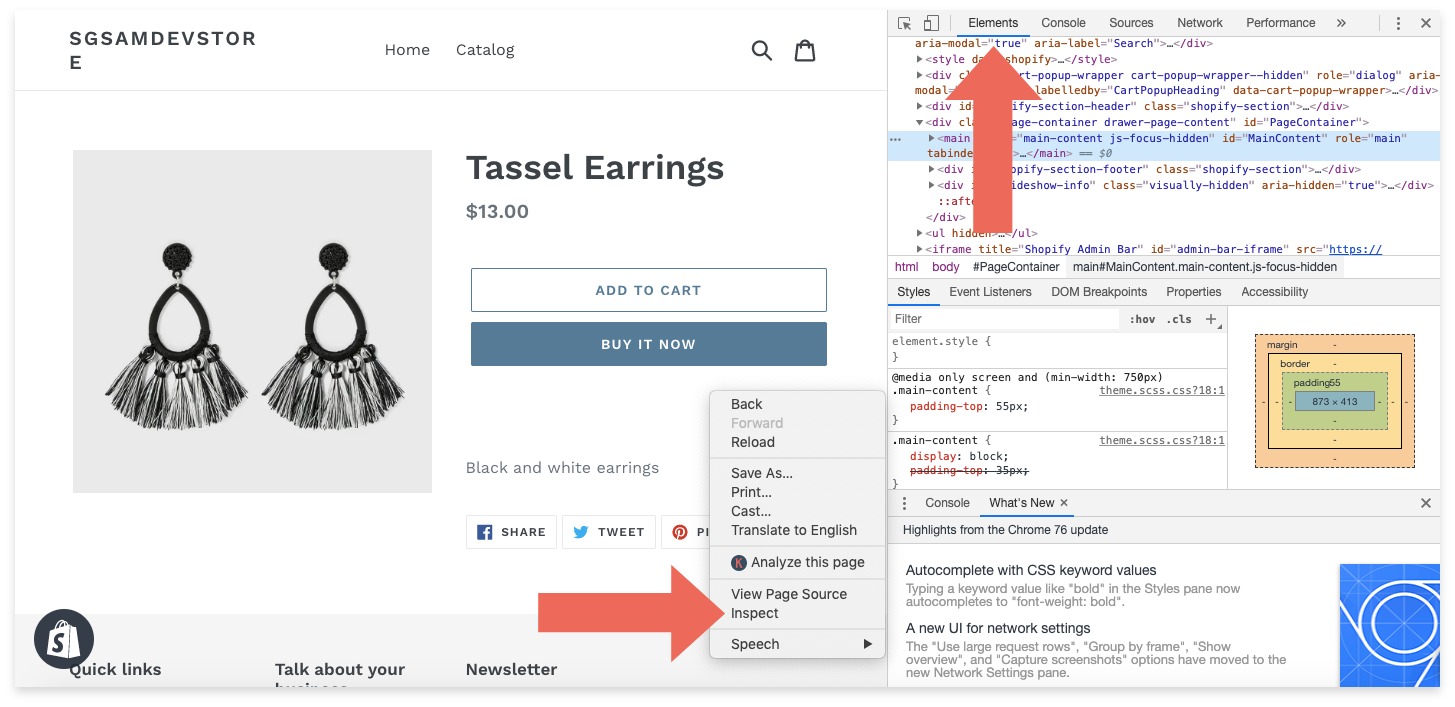
From here, you can click the icon of the box with the arrow inside (top left corner of inspect window). You can now hover over different elements on the page (add to cart button, product image, etc.) and various elements will be highlighted:
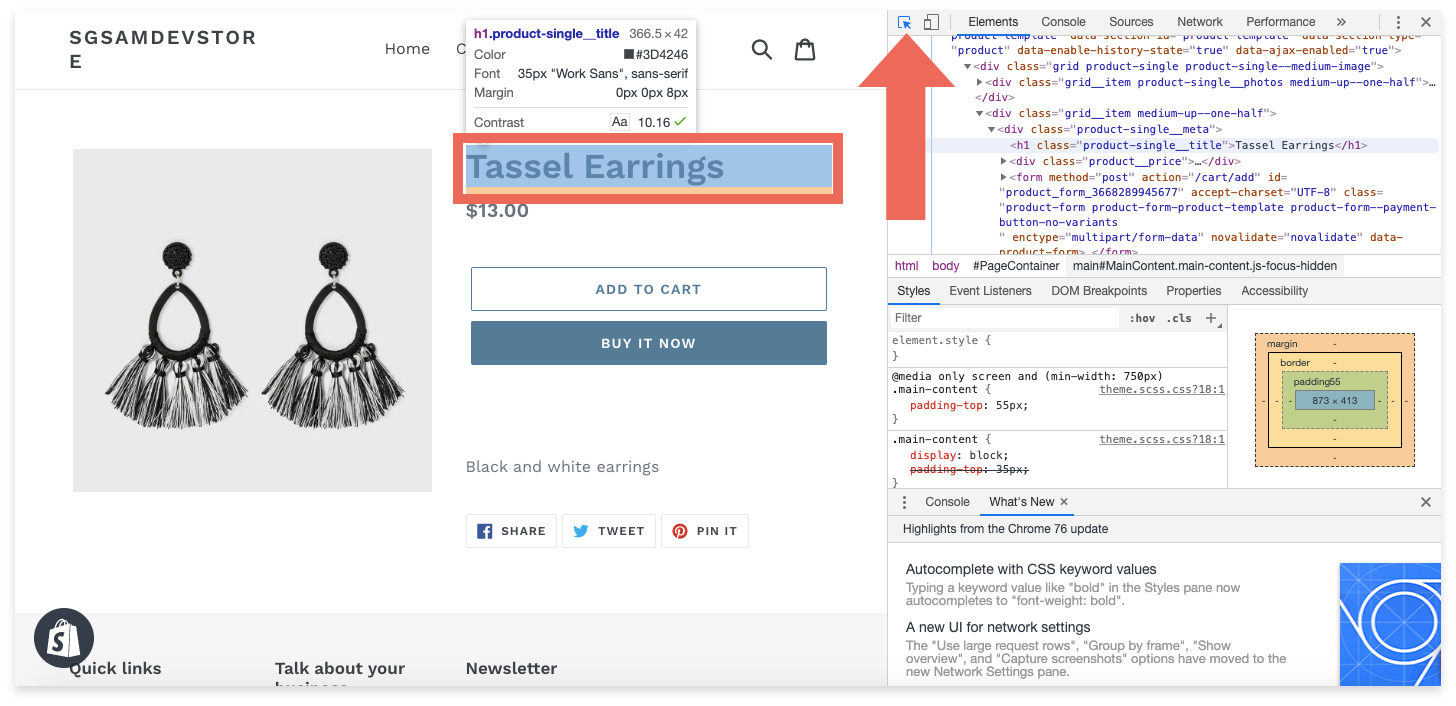
Step 2: Click on the element that you want to target and identify the CSS class or ID that you would like the widget to attach to (either above or below)
*Note: Make sure that you target an element that is consistent and will be shown across all product pages. You should also be aware of the placement of the widget as the screen resizes from desktop to mobile devices. For this reason, we suggest placing the widget before the call to action element (Add to Cart button, Buy Now button, etc.) to ensure that the donation widget will show on all eligible product pages 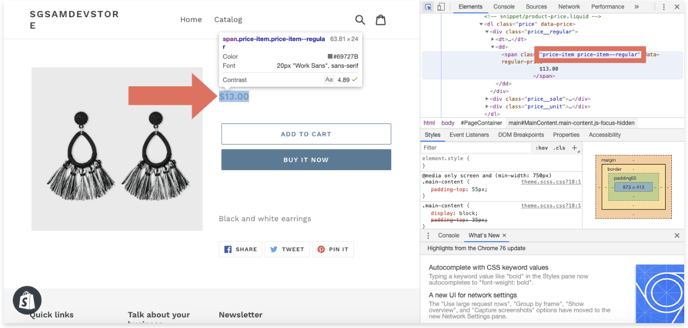
Step 3: Navigate to the Campaigns drop-down menu and select the campaign of your choice, then select the Widget Settings tab. Find the Widget Location section and copy and paste the element into the Target CSS Selector field.
*Note: If you are targeting a CSS class, you must put a decimal (.) before the class name - if you are targeting an ID, you must put a hash (#) before the name.
Step 4: Save your changes, preview your updates, and clear your cache. If you are not activated yet, make sure you visit your Global Settings and open Preview Mode (located above the “Start Giving” button)
*Note: Each time you change a widget location using the Custom CSS selector, be sure to save the changes as well as clear your cache!